Updating the information in tracker artifacts is one important way that project members can work together effectively.
For example, when the work defined in the tracker item is completed, change its status from Open to Fixed.
Your tracker administrator may have set up work flow rules that constain your ability to do certain kinds of updates. For example, an administrator may have specified that only users with the "QA Engineer" role can change an artifact's status from Open to Closed.
A project manager might also change an artifact's priority, return it to the submitter for additional clarification, or assign it to a project member for resolution or action.
Generally, the project member to whom the tracker artifact is assigned will update the status. Any project member with the appropriate permissions can add comments.
- Click TRACKERS from the Project Home menu.
- On the list of project trackers, click the tracker you want to update.
- On the List Artifacts page, select the tracker artifact you want to update.
- On the View Artifact page, click Edit.
-
On the Edit Artifact page, make your changes.
- Select a tracker type from the Tracker drop-down list to change the artifact's tracker type.
- Edit the artifact's title and description.
- Click Save.
-
On the View Artifact page, change any other fields if
required, and click Update.
-
Now project members with CREATE/EDIT permissions can also create new tags or add existing
tags, if required from
View
Artifact page. Tags creation from
View
Artifact page enables you to create
tags on the go and overrides the limitation of creating tags only from
the Tags page. However, you cannot rename or
delete a tag from
View
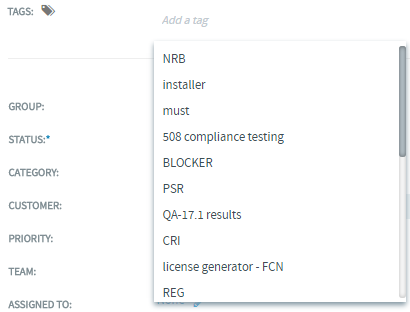
Artifact page. Click the
 button next
to Tags field to get the list of tags mapped to
your project. You can add up to a maximum of 10 tags to any artifact and
a message is displayed if you try to add more than 10 tags. If the
entered tag name is not available already, a context menu
Create a new tag shows up for you to create a
new tag with the desired tag name.
button next
to Tags field to get the list of tags mapped to
your project. You can add up to a maximum of 10 tags to any artifact and
a message is displayed if you try to add more than 10 tags. If the
entered tag name is not available already, a context menu
Create a new tag shows up for you to create a
new tag with the desired tag name.
 Note: Wherever the tag widget is not applicable, the associated tags are displayed as read only tags. For example in View Artifact page.
-
Now project members with CREATE/EDIT permissions can also create new tags or add existing
tags, if required from
View
Artifact page. Tags creation from
View
Artifact page enables you to create
tags on the go and overrides the limitation of creating tags only from
the Tags page. However, you cannot rename or
delete a tag from
View
Artifact page. Click the